Trying Out Seafile

In college, I mostly used Dropbox to handle all of my file syncing needs. As I approached graduation, I setup an Owncloud droplet (which is now a Nextcloud instance) to supplant my Dropbox usage. While it has worked fairly well, I’ve been watching seafile from a distance the last few years, but haven’t taken the time to try it out. I have now.
Seafile

As stated on their website:
Seafile is an enterprise file hosting platform with high reliability and performance. Put files on your own server. Sync and share files across different devices, or access all the files as a virtual disk.
While self-defined as an “enterprise file hosting platform”, there is a Community Edition that is Free & Open Source… which is exactly how I like my software. So lets get started.
Setup
Similar to a Nextcloud configuration, to get seafile up and running, a server component is first installed. Afterwards, clients connect to it.
Server
The countless number of configurations seafile supports may make setting up the server component for the first time a bit intimidating. There are several database back-ends (SQLite, MySQL…), web servers (Nginx, Apache), and advanced options (Memcached, LDAP, etc) which can be selected. However, the seafile developers do provide an installation script to easily install both the Pro and Community editions under Linux. Which is what I used.
Download
The first step is to download the server application. A link for the install package can found partway down the download page. After Downloading, extract the contents of the package.
wget https://download.seadrive.org/seafile-server_6.2.5_x86-64.tar.gz
tar xf seafile-server*.tar.gz
Inside the extracted directory, there are several setup-seafile-*.sh* scripts.
I just used the basic setup-seafile.sh one.
Dependencies
Depending on which setup script it used, and the state of the host machine, there may be some missing dependencies. While I am sure there is a nice list of the required dependencies posted somewhere… I didn’t look for it. If I am being completely honest… I just kept repeatedly running the script, and installed whichever package it yelled at me for each time. Eventually, the install worked. On my fresh install of Ubuntu 16.04 server, this meant installing the following dependency packages:
- python-setuptools
- python-imaging
- sqlite3
This means that on an Ubuntu 16.04 server, a simple sudo apt install python-setuptools python-imaging sqlite3 should do the trick…
Install Script
With the dependencies installed, the script should run through without screaming for missing packages. However, it will ask for a few pieces of information including server-name, server-ip/domain, data-dir, and fileserver port to install the fileserver component. Answer accordingly.

After configuring the fileserver, the script will flow right into configuring Seahub, the web interface that sits on top of the fileserver. This part is less needy, and will only require an [Enter] press to continue.
At the end, the script should display useful information about how to start/stop/reset the servers, as well as what ports each part is running on.
Run & Start
Starting the servers is done by doing what the script says… run the following commands:
./seafile.sh start
./seahub.sh start
With the servers running, it may be necessary to configure the firewall to allow their ports. On Ubuntu 16.04:
sudo ufw allow 8000/tcp
sudo ufw allow 8082/tcp
That’s it. With any luck, clients should be able to connect to the server (assuming the server is reachable from the client computer… but that’s a lesson for another day).
Note: The first time seahub is run, it will need to setup an admin account. So while it was nice and considerate in the last step… it will insist on being supplied a username (email) and password for the new admin account. Again, just comply.
Client
The seafile desktop client was trivial to install. It was in the Solus repos, so
I just needed to run sudo eopkg it seafile-client, and I was done. I also
installed it on my work computers (which unfortunately runs Windows 10), and
even that was simple. I just downloaded and installed the Windows “Desktop
Syncing Client” at the top of the download
page.
My Thoughts

I have been using seafile as a syncing solution for the past few weeks. After the initial setup, it has been rather uneventful… which is a good thing. It just runs in the background, and I don’t really think about it. Exactly what you want with a syncing solution.
That being said, I haven’t fully dug into all of the details of the application yet. So, if I incorrectly critique something due to my own ignorance that simply isn’t true, I apologize in advance.
What I Like
-
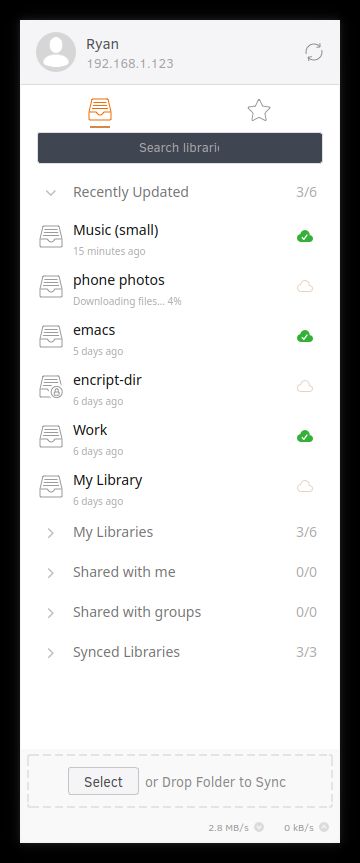
Desktop Client - The desktop client is simple. It responds quickly, and is a nice little command center where I can view how seafile is configured on each individual system.
-
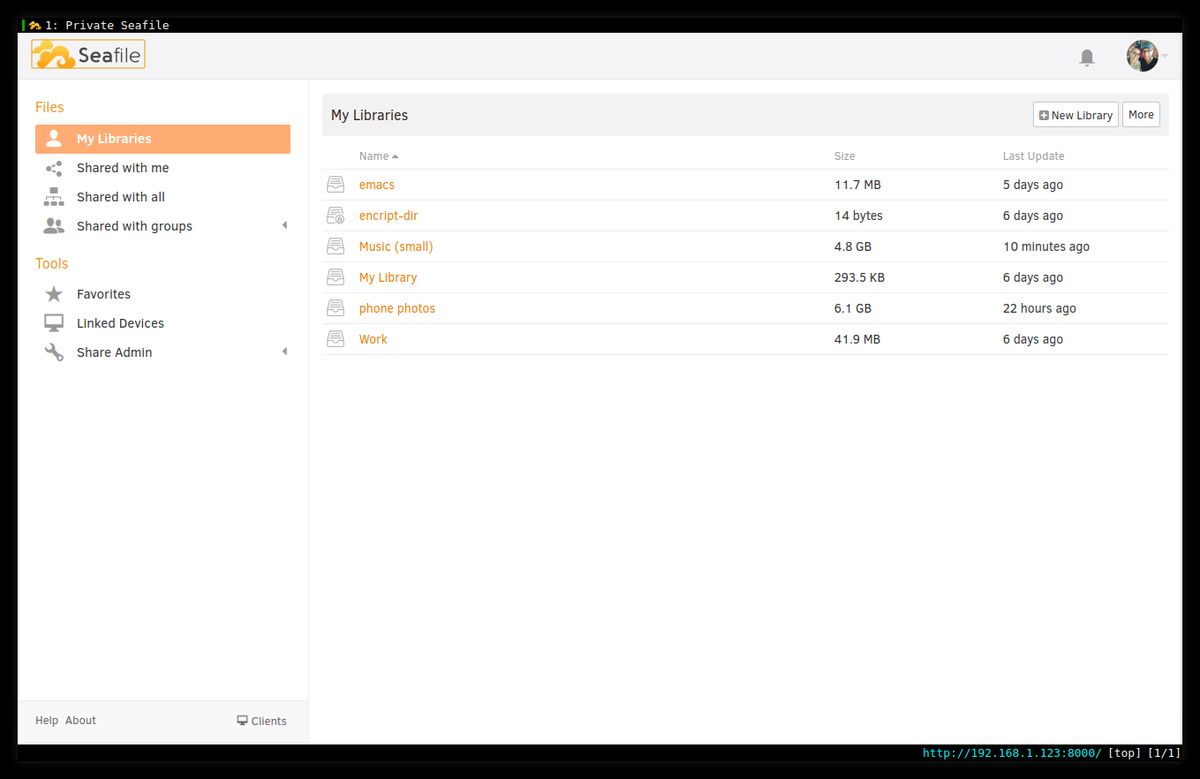
Select which Libraries to sync - Seafile libraries allow me to sync only what I need. Nextcloud had this feature, but it was implemented a little differently. I had to go to the
Nextcloudfolder in the client UI, and then check/uncheck all of the sub-folders I wanted to sync on my machine. -
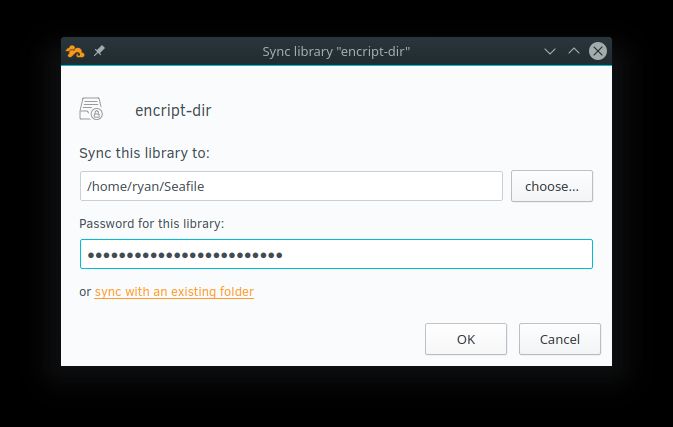
Pick where each libraries sync - Even better than being able to pick which libraries to sync, is having the power to choose where each one will reside. In seafile, the location of each library is completely independent. For example, I can sync my
worklibrary to~/Documents/Work/, myMusicto~/Music, andemacsto~/Documents/Programming/Editors/why/so/many/diectories/emacs/. On another computer, I may choose to only sync myworklibrary to~/Desktop/work(It doesn’t have to be the same across computers). I love this. It lets seafile integrate with my workflow, rather than forcing me to make it be my workflow. -
Encrypted Libraries - When creating a new library, it is possible to make an encrypted one. These libraries use client-side, end-to-end encryption and require a password. The file contents (Note: not directory or file names) are encrypted on the client side, and not on the server. This means that even the server admin cannot access the file contents on the server. This is a feature I’d like to see in more applications.

- Fast Sync - I only have anecdotal evidence, but the syncing in seafile feels fast. Files seem to pull down very quickly, and setting up my libraries on a new device doesn’t take a very long time. I might have to actually measure if it’s any better than something like nextcloud, but if I’m happy… does it really matter?
What I Don’t Like
-
No Folders/Nested libraries - As far as I can tell, I don’t think it is possible to organize seafile libraries with folders, or a nested library structure. Admittedly, this is one of those areas that I haven’t had to look too much into yet. However, as I start to increase my seafile usage and the number of my libraries increases, I could see this being a feature I’d really enjoy.
-
Phone Sync Tricky - The phone sync (specifically auto photo upload) was tricky to get working at first. After setting it up, it didn’t seem to work, or at least not as promptly as nextcloud does. I took a few photos to test it out today, it seemed to work okay, but I don’t think it started syncing right away. Right now, I don’t 100% trust it to work without me thinking about it. Hopefully this improves with time.
Future Plans
To summarize, I have been loving seafile, and I think I have only scratched the surface. I haven’t even tried playing with features like History and Snapshots, Full Text File Search, or yet. My plan is to continue experimenting a bit more, and then switch to it as my main syncing system when I redo my main server setup in a couple of weeks. If you haven’t given seafile a try recently, I recommend it.