Creating Tests For This Website - CI

In the last post, I setup some simple
testing for my website builds to that ensure that pages were being served
correctly. However, I can’t trust myself to always manually run the tests
before merging a branch into master. Luckily, I have
Jenkins to take care of all the “responsible” tasks. In
this post, we will take the test framework created in the previous post… and
automate it.
What I’m Using

I have started using Gitlab for more of my projects recently, but have decided to keep my website source hosted on Github for the time being. So, I won’t be using Gitlab’s CI/CD tools for this, but I wanted it to be known that this automation is very straight forward and could be easily accomplished there as well.
For this project, because my website is hosted on Github, and I already have my own Jenkins server configured… I will be using a Jenkins pipeline. First, we will create the pipeline file to add to the git repo. Then, we will use the pipeline to configure a new multi-branch pipeline in Jenkins.
Jenkinsfile
Lets start by creating the Jenkinsfile. Create a new file named Jenkinsfile
in the project directory. Next, lets create a new pipeline and get ready to add
stages:
pipeline {
    agent any

    stages {

        // This is where the stages will be defined //

    }
}
(Make sure to add the closing }'s!)
Stages
Now, lets add the stages. A stage is a named, functional chunk in our pipeline. Breaking the pipeline into stages will help keep all the various steps organized, as well as make it easier to follow along as the pipeline runs.
Each of the following stage definitions will be placed inside the stages { .. } section we defined above (in the same order as they are listed!).
Setup Deps
stage("Setup Deps") {
    steps {
        sh 'sudo yum update -y'
        sh 'sudo yum install -y epel-release'
        sh 'sudo yum install -y hugo python36-pytest'
    }
}
The first stage is ‘Setup Deps’. This stage handles installing any dependencies
our Jenkins node will need installed to run the tests. Our tests will require
hugo, pytest, and python3. It will also require some pip packages, but
we will get to that later.
Note: My current Jenkins node is running CentOS, so my package manager commands are specific to that. As always, adjust accordingly.
Start Hugo Server
stage("Start Hugo Server") {
    steps {
        sh 'hugo serve &'
    }
}
With hugo installed (and presumably being inside the website’s git repo…),
we can start the web server. This is done with hugo serve. The & is used to
have the server run as a background process so that it won’t be killed when the
pipeline to continues on.
Note: Make sure the tests are set to point to localhost:1313, as that is
where hugo will try to serve the website by default.
Setup Python
stage("Setup Tests") {
    steps {
        sh 'pip3 install pipenv --user'
        sh 'python3 -m pipenv install'
    }
}
Next, lets configure python by setting up an environment and installing the
packages we need in it. First, I use pip3 to install pipenv. Then, I have
pipenv install the tests’ required python packages, which are defined in the
repo’s Pipfile.
Run Tests
stage("Run Tests") {
    steps {
        sh '''
            set +e
            python3 -m pipenv run pytest -v --junit-xml himmallright-source-test-report.xml .
            set -e
        '''.stripIndent()
    }
}
Test time. I again utilize pipenv here, by having it call the test command
(pytest -v --junit-xml himmallright-source-test-report.xml .) so that it runs
in the pipenv virtual environment.
Two things to note here:
- The
--junit-xmlflag defines a xml filename to write the junit test report to. This will be used by Jenkins to collect the test results. - The test command is wrapped between
set +eandset -ecommands, which allows tests to fail but without triggering a pipeline failure in Jenkins. This way even if tests fail, we make it all the way through collection so we can see what tests failed and why.
Collect Test Results
stage("Collect Test Resuts") {
    steps {
        archiveArtifacts "himmallright-source-test-report.xml"
        junit "himmallright-source-test-report.xml"
    }
}
Next, we archive the junit report xml file as a Jenkins artifact (just in case). Finally, we have the junit plugin collect the report.
Save & Commit
That should be it for the pipeline file! Commit and push it to the git repo, and we can start working with it in Jenkins!
Multibranch Pipelines
With the Jenkinsfile in the repo, we can create the pipeline! Specifically,
we will be creating a mult-branch pipeline. A multi-branch job scans a git
project, and creates a separate pipeline for each branch or PR in the repo.
This is beneficial for testing, as it will automatically instantiate a test
pipeline against a newly created PR, so we can verify that the PR passes the
tests before merging it into the master branch. Additionally, it lets us make
sure we aren’t breaking anything while working in a new branch.
Creating the Pipeline
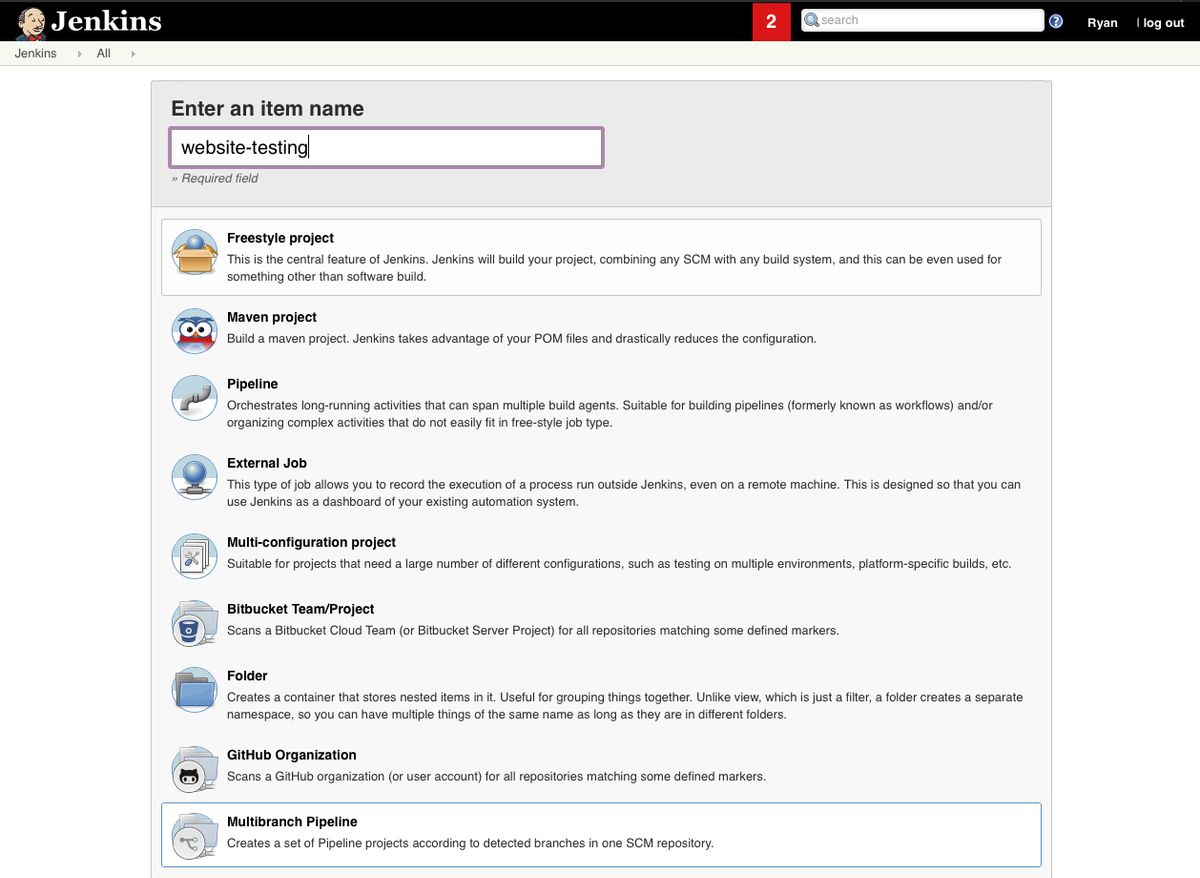
To create a Multi-Branch pipeline, select New Item in the menu on the left. Next, enter a name for the pipeline and select Multibranch Pipeline at the bottom. Click Ok.
Configuring the Pipeline
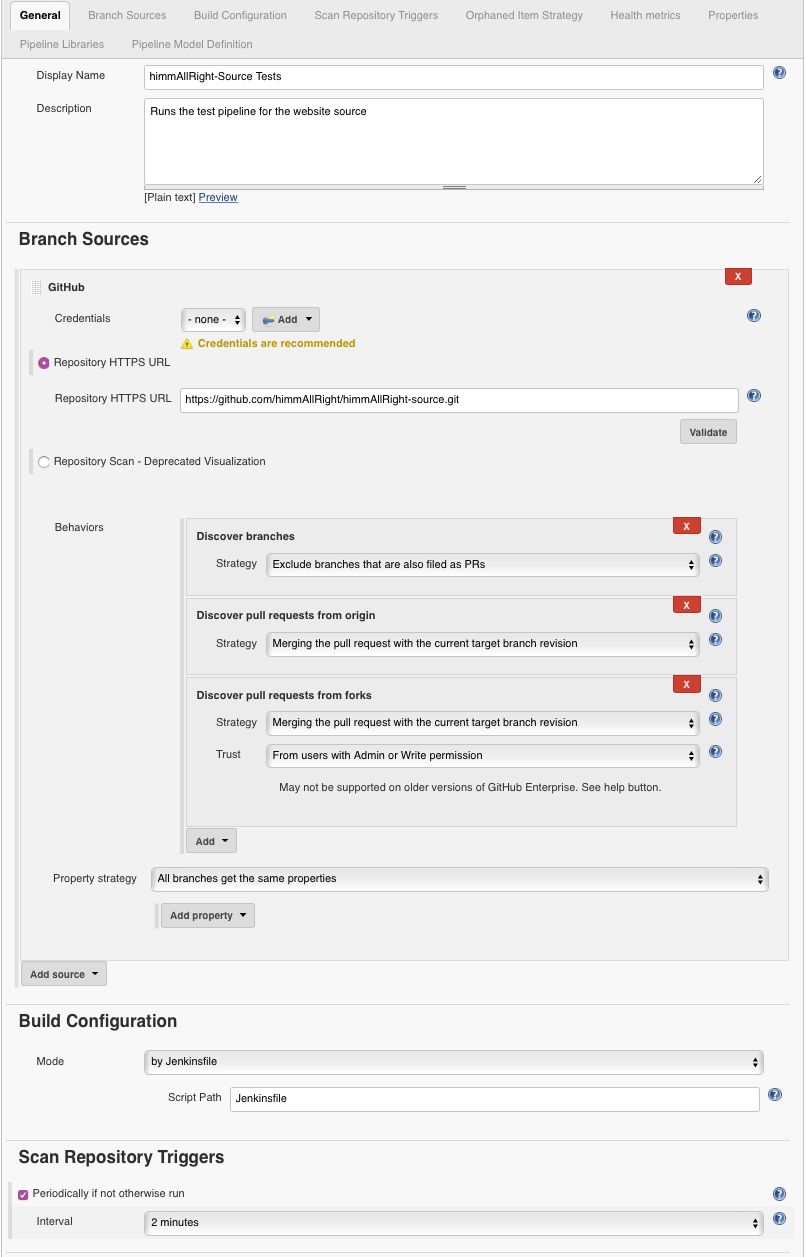
On the pipelines configuration page, start by filling out the Display Name
and Description text boxes. Next, go down to Branch Sources and click on
Add source. My website is currently hosted on Github, so I will select that.
However, select Git if your project is hosted on another git service.
Add the Repository URL and choose the pipeline Behaviors. The Behaviors define how the pipeline will split up branches. For example, it can be selected to only discover branches that are also PRs.
Next, in the Build Configuration section, be sure that the Script Path
defines the path where the Jenkinsfile is located. If it’s in the root
directory (and named Jenkinsfile), the default should work.
Lastly, select an interval to automatically check the repo for changes in the Scan Repository Triggers section. This step is optional, but I highly recommend it.
That’s all we need to setup, but feel free to research more options. I mostly have defaults selected for the rest. When complete, hit Save.
Running Pipelines
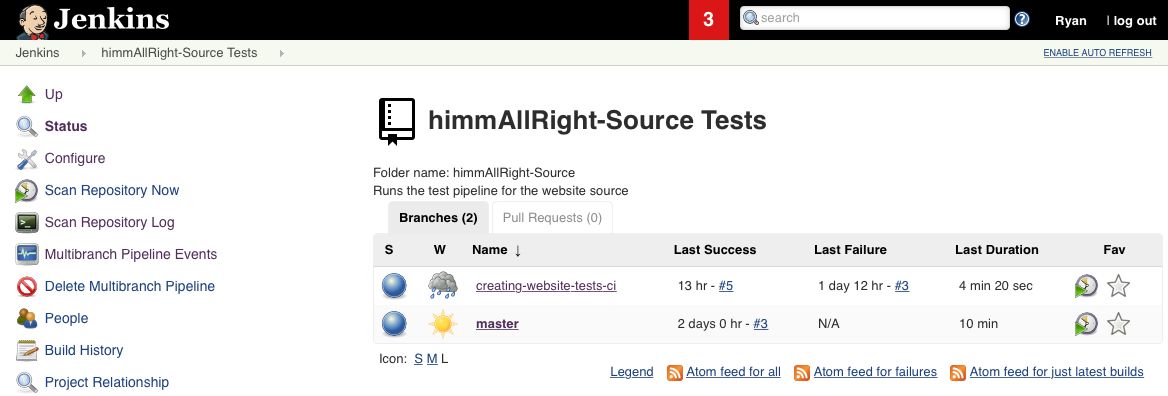
Once the multibranch pipeline is created, it should scan the repo to detect any
branches or pull requests that have defined Jenkinsfiles. It will create an
job item in the list for each branch/PR it detects (and kick off runs for
each).
To manually start a scan, select Scan Repository Now in the menu on the left, and it will scan all the branches again, looking for changes, and kicking off pipeline runs for any branch or pr that has changed.
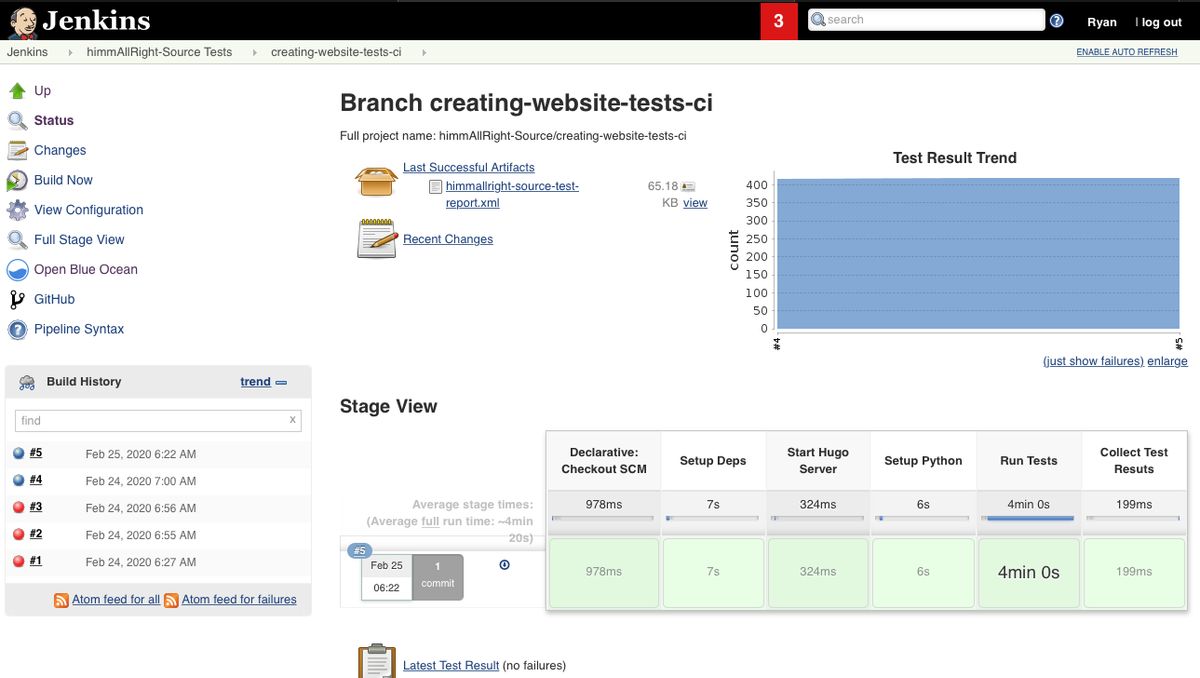
To manually start a specific branch run, click on the branch name to enter the branch’s job overview page. Then, simply click Build Now on the left. Once the run starts, it runs like a normal jenkins job and can be viewed by clicking the job’s run number to the bottom left. The job’s progress can then be viewed on that page, or using Blue Ocean (Recommended).
Viewing Results
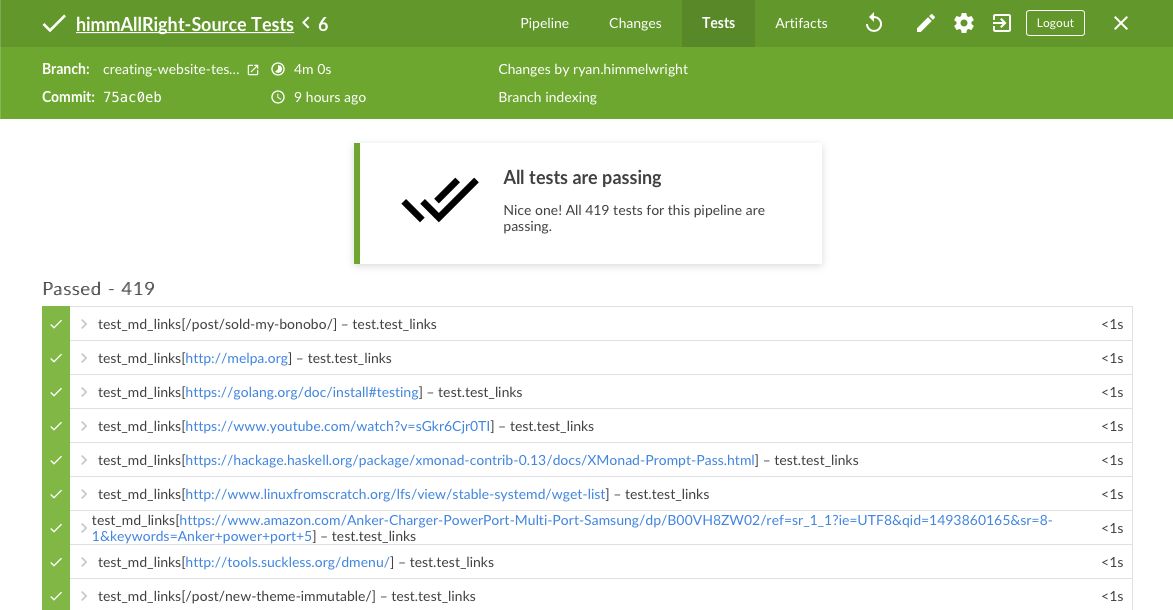
Personally, I prefer to always view the test results using the Blue Ocean viewer. Once a job completes, select the Tests tab at the top of the viewer to see the collected test results (this is what the junit steps in our pipeline does). If all the tests passed, the page will be green and list all the completed tests. If some failed, it will be yellow. When there are failed tests, they can be clicked, and the row will expand to show the failed test’s error message and stack trace. For my test set, this makes it easy to see which page failed, and even know what status code was actually returned in the response (by looking at the stack trace). Very helpful!
Conclusion
There we go! Not only do we now have the website tests automated as a pipeline, but as a multibranch pipeline. This should help automatically ensure that nothing breaks as I edit and add to the website. It will even run the tests against all my PRs, so I can be confident that when I merge to master, it won’t slowly degrade my website over time. I have one more post about these tests planned, but in the meantime… enjoy Jenkins!