Flashing My Ferris Sweep Using QMK

In my previous post, I detailed the build process for my ferris sweep keyboard. After building it, I needed to flash the keyboard with firmware. Like many custom keyboards, it uses qmk. Here’s how I flashed my 34 key layout on the ferris sweep.
Create the layout file
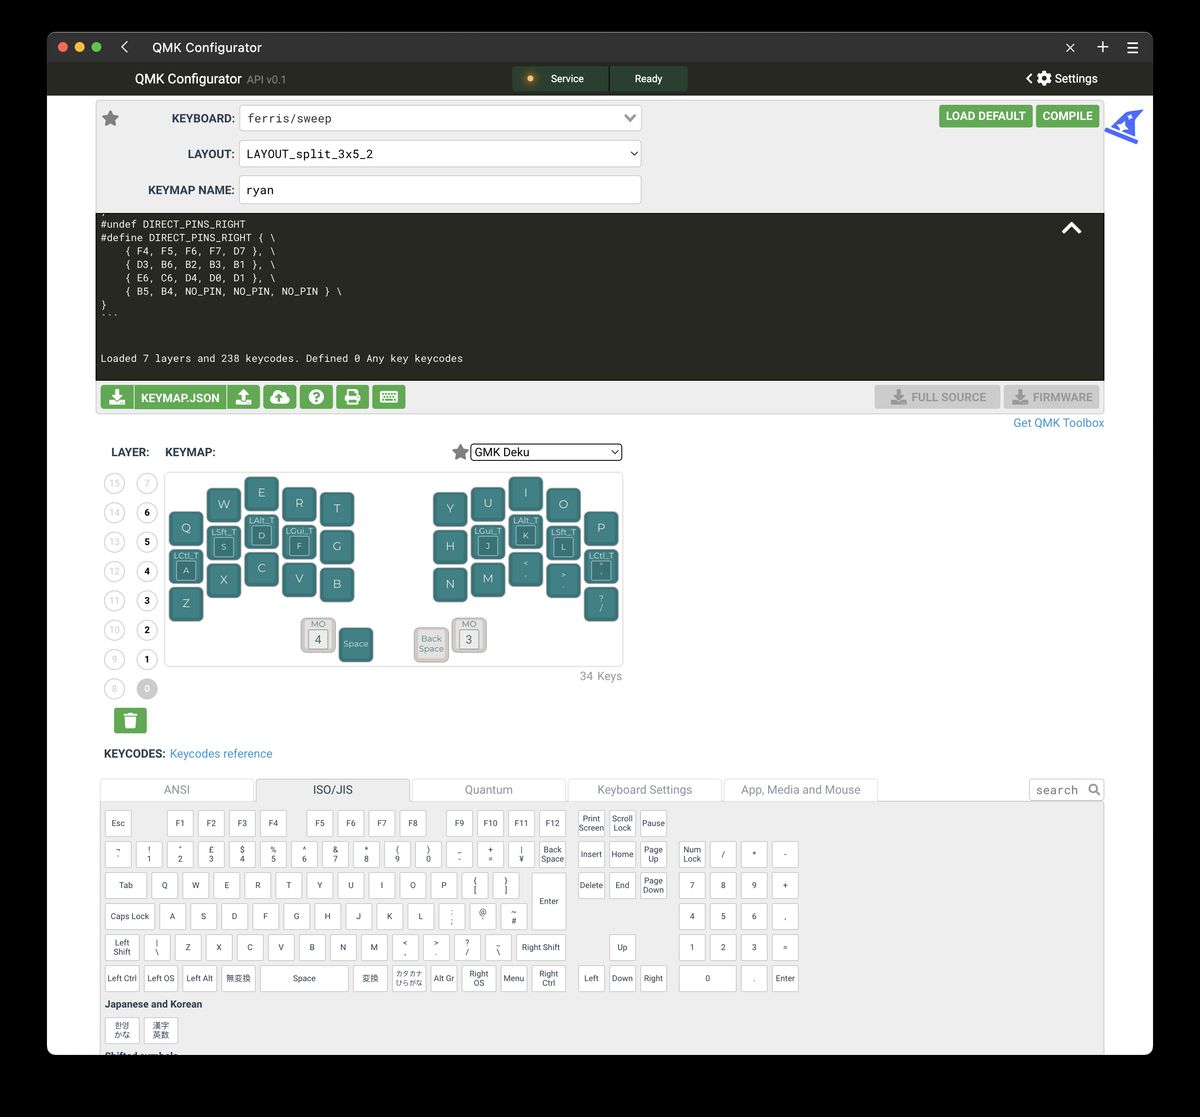
The first step when flashing a QMK keyboard is to build a layout file. I created my layout using the online qmk config tool. From the tool, I was able to select a ferris sweep base layout, and then assign all the keys to match the layout I previously tested on my ergodox (with a few changes). Setting all the keys took some time, but I should only have to do that once. For future changes, the layout file can be uploaded and edited from the configurator. Once completed, I downloaded the layout file and saved it to my dotfile repo.
QMK Setup
Install & Setup qmk-toolbox
With a layout file, we can start using QMK to flash the keyboard. In general, there is good documentation about how to do that here. Regardless of your setup, the first step is to install QMK:
On MacOS:
brew install qmk/qmk/qmkOn Linux, it’s suggested to install qmk using pip. So on my Fedora computers:
sudo dnf install python3-pip
python3 -m pip install --user qmk
Note: on Linux I hit a qmk command not found bug. This is because
$HOME/.local/bin was not part of the path. So, either add it to your path, or
just run the commend directly: ~/.local/bin/qmk COMMAND.
Next, you need to run the setup. This will take care of several setup tasks, like downloading the firmware repo and installing dependencies. It will prompt you with a few questions, but most can remain the default value it suggests.
qmk setupIt will take a few minutes to download and install everything, but afterwards should be all set.
Compile the hex file
To build the firmware file, I first created a new keymap directory and downloaded my layout file to it:
# Copy downloaded keymap file to compile location
cp ryan-test.json ~/Builds/qmk/keyboards/ferris/keymaps/ryan/keymap.json
Next, I compiled the new firmware, using the keymap I specified:
# Compile layout
qmk compile -kb ferris/sweep -km ryan
Lastly, I moved the compiled hex file to a location where the QMK toolbox would be able to see it (out of a hidden directory).
# Move compiled hex file from build directory to one QMK Toolbox can see (non-hidden)
cp ~/Builds/qmk/.build/ferris_sweep_ryan.hex ~/Builds/qmk/ferris_sweep_ryan.hex
Flashing the Ferris Sweep
To flash the ferris sweep, make sure it is connected to one of the halves. From there, open up the QMK Toolbox application.
Load layout file
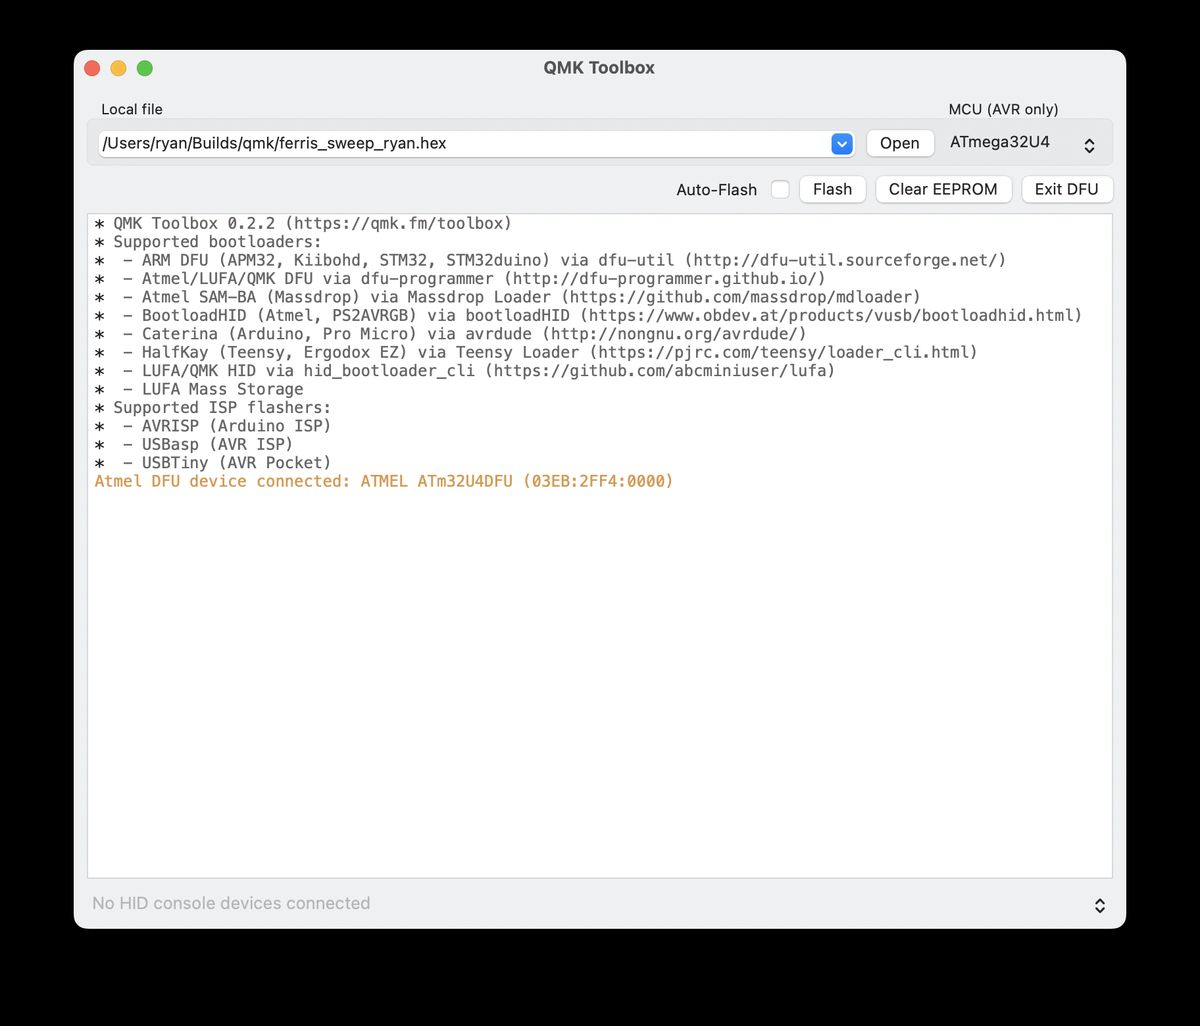
In the configuration tool, open your compiled hex file.
Reset
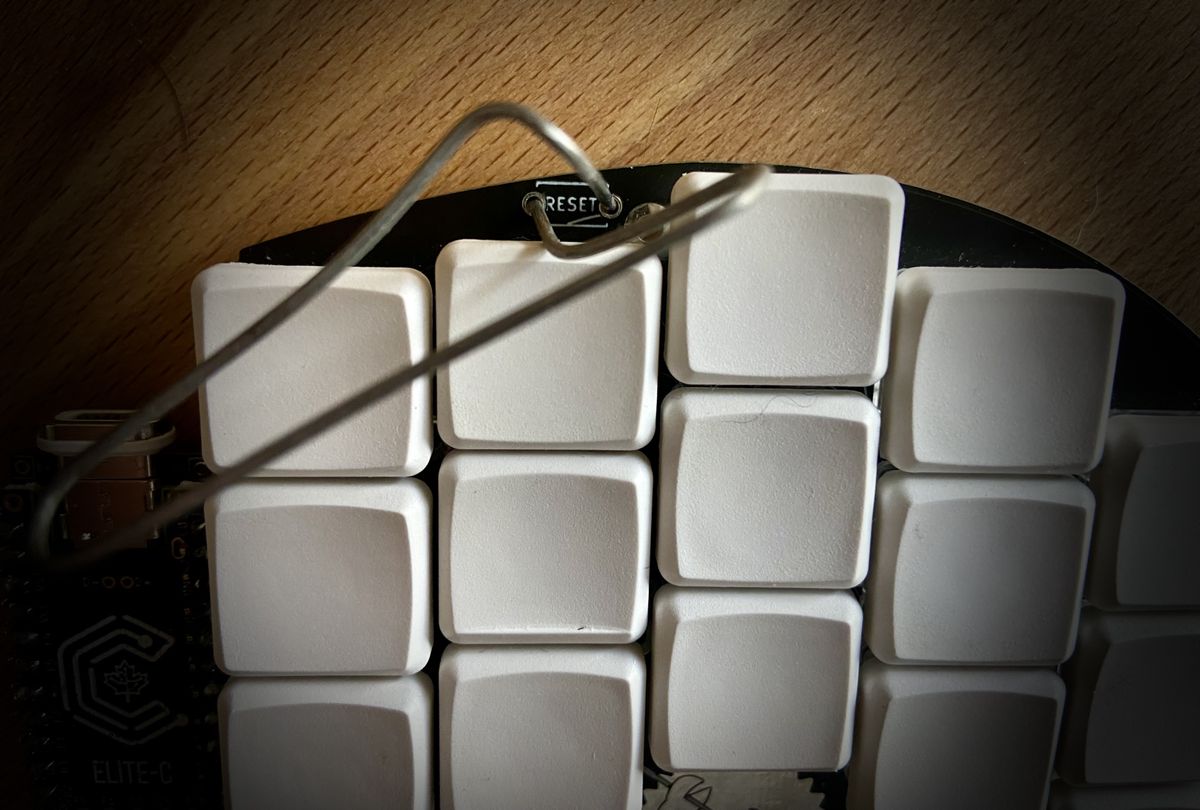
In order to flash the keyboard, you have to switch it to reset mode. If you installed a reset switch/button, use that. If not, you can reset the board by connecting the two reset holes using a piece of metal. When I built my sweep, I used a pair of metal tweezers, but I have since graduated to using a bent paper clip (so fancy!). Use whatever works.
Select Half
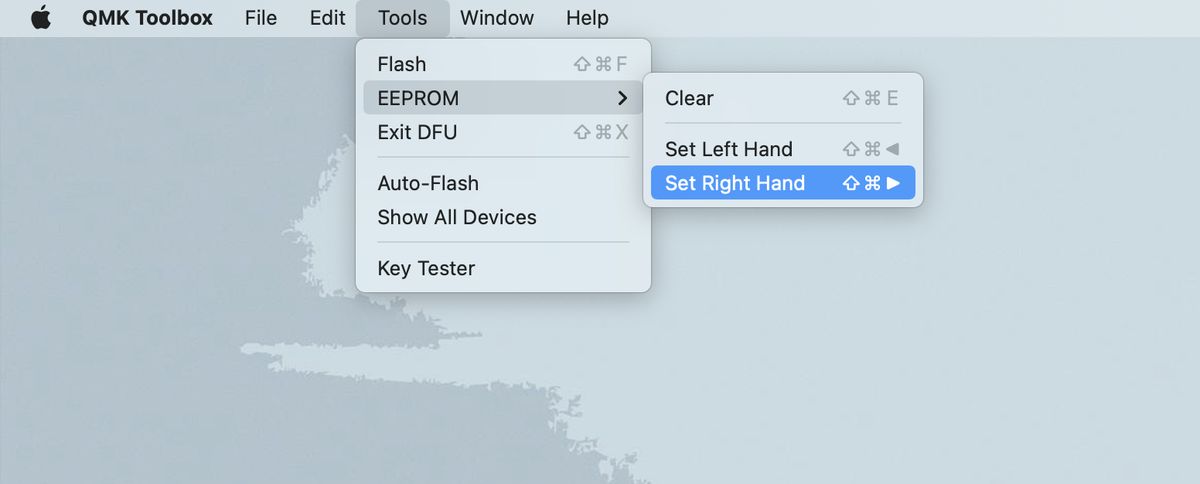
Due to the reversible PCB for each of my ferris sweep halves, I need to select the handedness for each half when I flash it. Otherwise, it doesn’t know which board is for which hand. To do this in the toolbox, navigate to Tools -> EEPROM in the menubar, and select the handedness you want. You might need to wait a second or two for it to load.
Flash
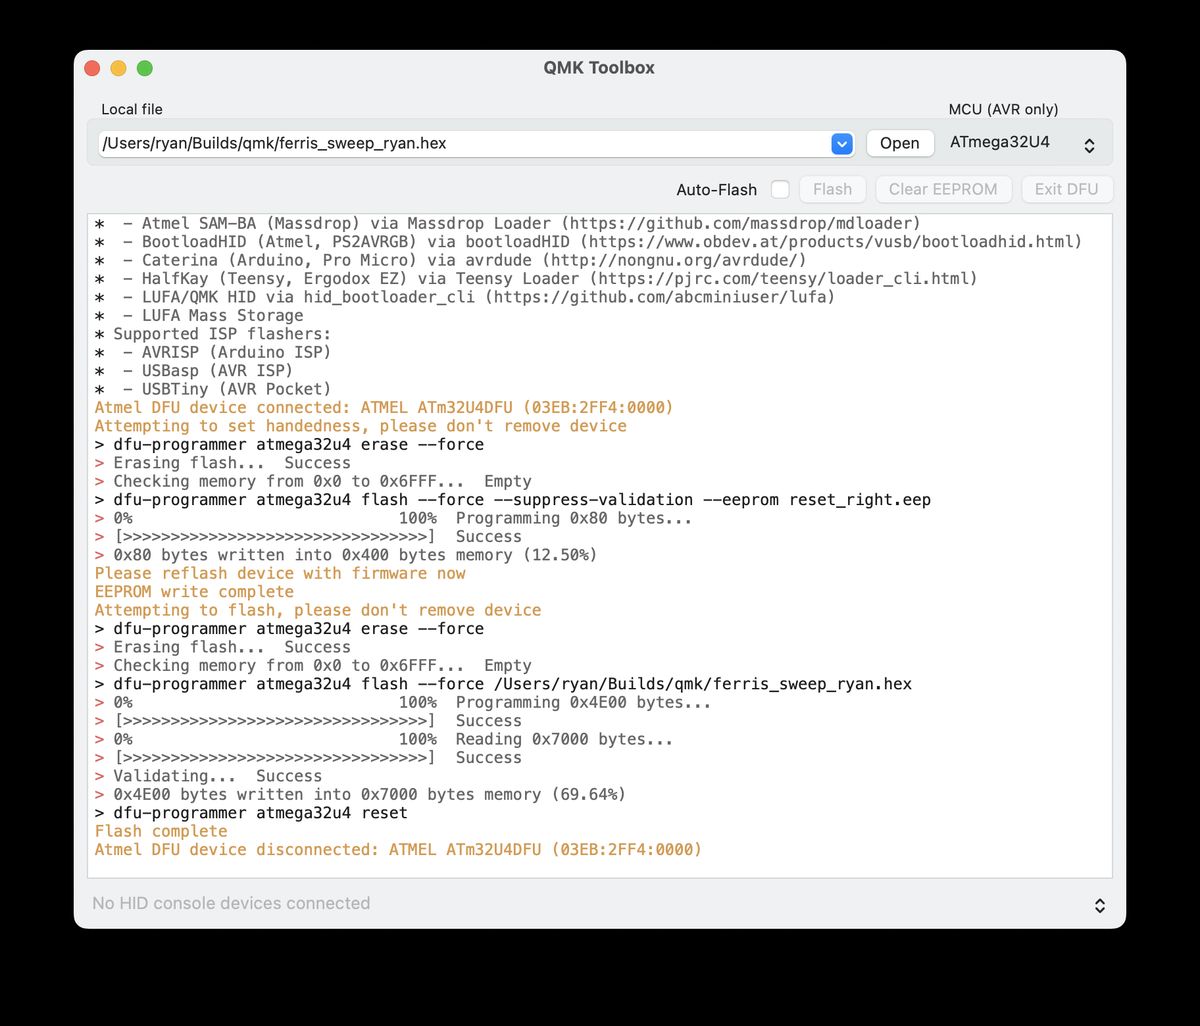
With everything set, flash the board by pressing the button! You might want to watch the log to verify it’s actually done before unplugging it.
Repeat for the other side
After flashing the first side, repeat the process for the other (load the file, reset, select handedness, and flash). Afterwards, all should be working!
I’m note positive if this step is required, but I always do it…
Some Layout Changes
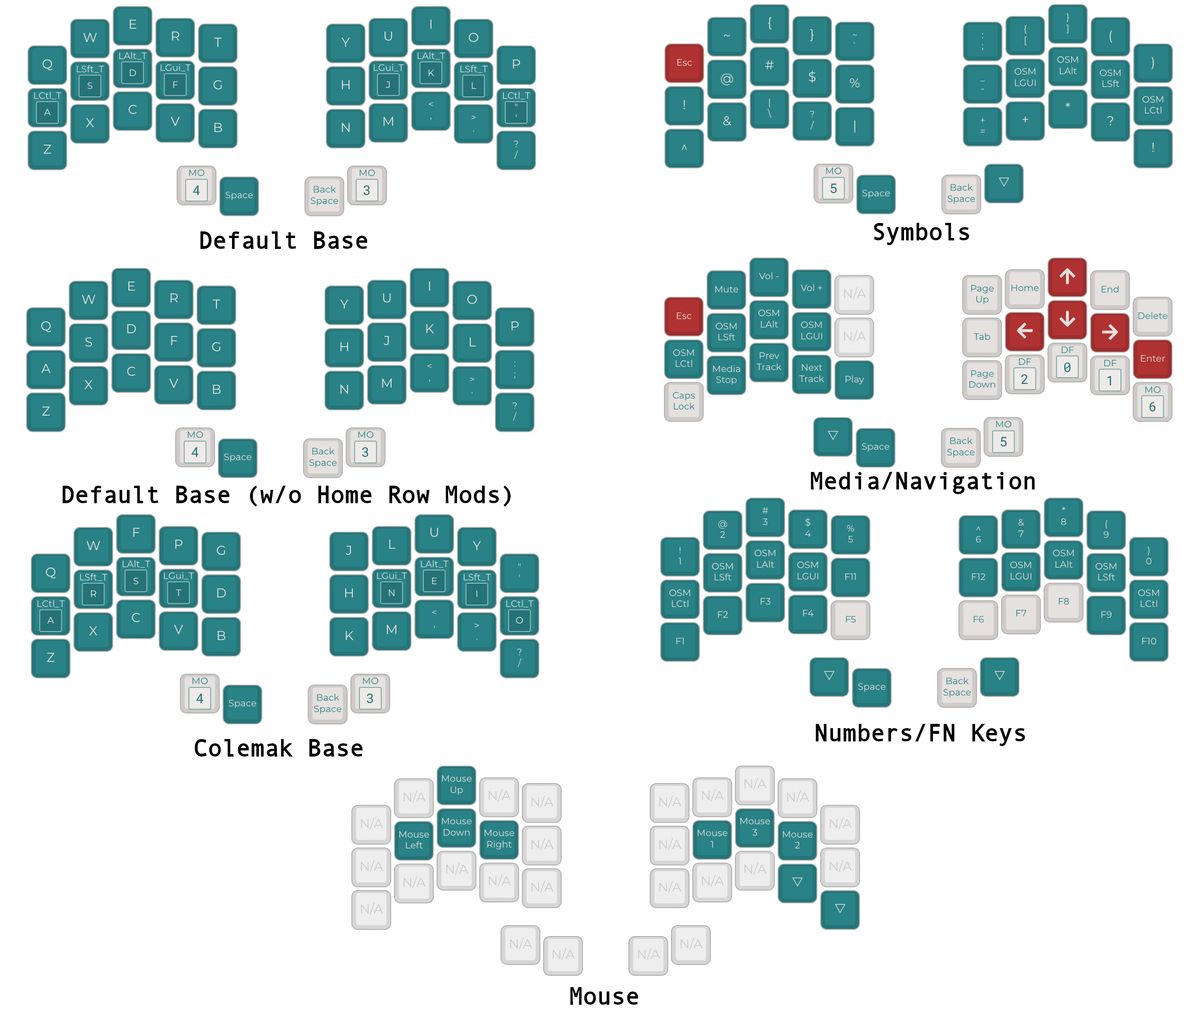
Since writing the post about my layout, I have made a few changes after using the ferris sweep for a few more months. Most of these changes revolve around adding different base layers that I can swap in and out using new keys added to the Navigation layer. In addition to my original base layer, I’ve added:
- A second default base layer that does not have Home Row Modifiers
- A base layer that uses Colemark instead of QWERTY
- A mouse toggle (not base) layer that I forget I have
Over time, I’d like to turn my non-home row mod layer into a layout designed for gaming, which is the one thing that this keyboard does not do well right now. But that’s about it.
Conclusion
This process took me a little bit to figure out the first time, but now that I know how it’s done, it isn’t that hard. Also, I don’t need to flash firmware as often now that I have a stable layout. Luckily, when I do finally make that ‘gaming’ layout, I’ll have this post to remind me how to flash it!